

Your wedding day is a celebration of love, and every detail, especially your hairstyle, should reflect your unique beauty and style. While intricate updos can be stunning, sometimes simplicity reigns supreme, offering timeless elegance and a stress-free styling experience. A beautiful bridal bun doesn’t have to be complicated; in fact, some of the most captivating looks are achieved with just a few expert steps. Whether you envision a classic, romantic, or modern aesthetic, a simple bun can be the perfect foundation for your dream bridal look.
This guide will walk you through several gorgeous, easy-to-create bridal bun hairstyles, providing step-by-step instructions, product recommendations, and expert tips to ensure your hair looks flawless from the first dance to the last goodbye. Get ready to discover the perfect simple bun that will make you feel effortlessly radiant on your special day.
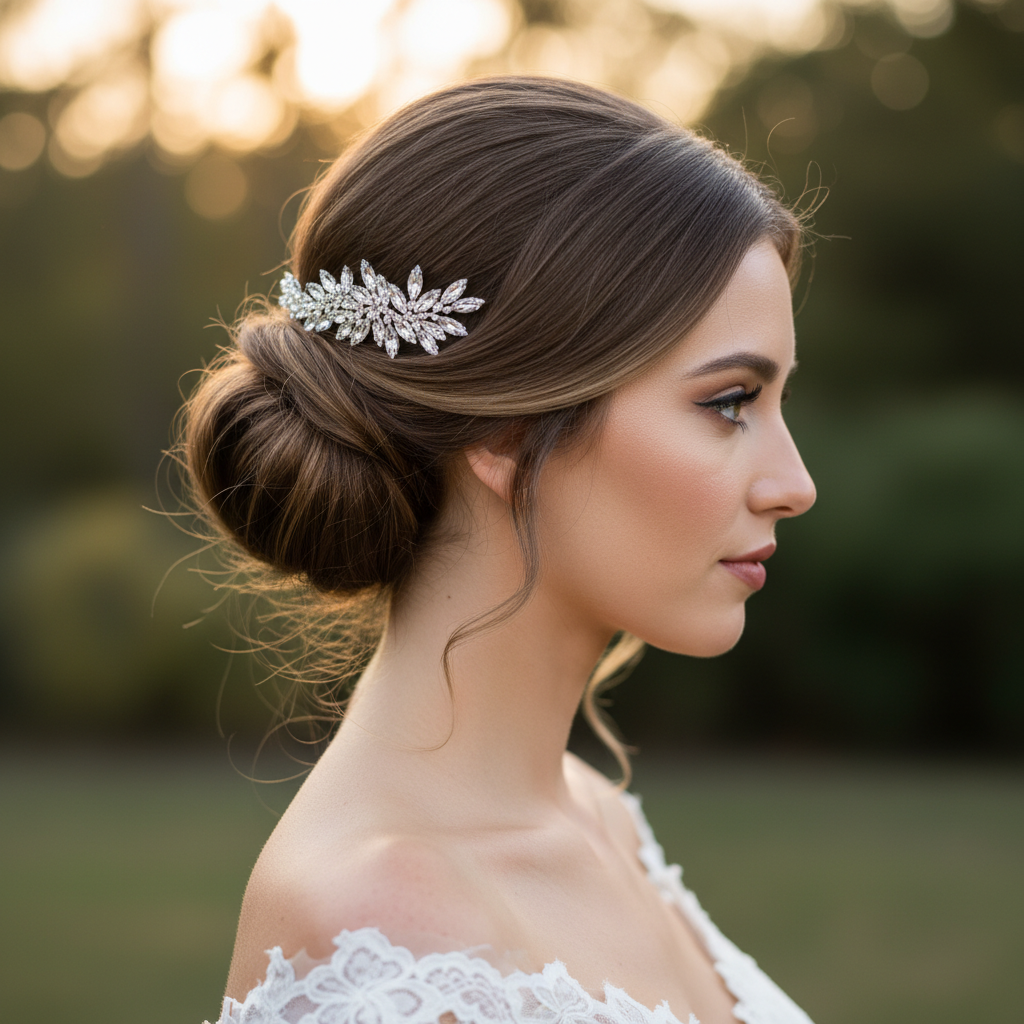
The Classic Low Bun
The classic low bun is the epitome of bridal sophistication. It’s understated, elegant, and provides a beautiful canvas for accessories like veils, tiaras, or delicate hairpins. Its timeless appeal makes it a favorite for brides seeking a refined and polished look.
Suitable Hair Length and Texture
- Length Medium to long hair works best, allowing enough length to create a substantial bun.
- Texture Straight, wavy, or lightly curled hair is ideal. For very curly or coily hair, a smooth blow-dry or light straightening may be preferred for a sleek finish.
Face Shape Suitability
This style is universally flattering, particularly for oval, heart, and square face shapes. It elongates the neck and highlights the décolletage, drawing attention to your facial features without overpowering them.
Styling Method or Technique
- Preparation Start with clean, dry hair. Apply a heat protectant and gently smooth hair with a flat iron if desired for extra sleekness. Create a neat middle or side part.
- Low Ponytail Gather all your hair into a low ponytail at the nape of your neck. Secure it tightly with a clear elastic band.
- Twist and Wrap Twist the ponytail tightly until it forms a rope. Then, wrap the twisted hair around the base of the ponytail, creating a neat bun shape.
- Secure the Bun Use bobby pins to secure the bun firmly to your head. Insert pins from the outside of the bun towards the center, ensuring they grip hair from both the bun and your scalp.
- Finishing Touches Gently tug at a few pieces around the bun for a softer look, or keep it super sleek. Smooth down any flyaways with a strong-hold hairspray and a fine-tooth comb.
Recommended Hair Tools and Products
- Fine-tooth comb
- Clear elastic bands
- Bobby pins (matching your hair color)
- Strong-hold hairspray
- Smoothing serum or anti-frizz cream
Tips to Make the Hairstyle Last Longer
- Start with day-old hair for better grip, or use a texturizing spray on clean hair.
- Use plenty of bobby pins and crisscross them for extra security.
- Finish with a generous mist of strong-hold hairspray, focusing on the bun and any potential flyaways.
- Consider a light mist of waterproof hairspray for outdoor weddings.
The Romantic Messy Bun
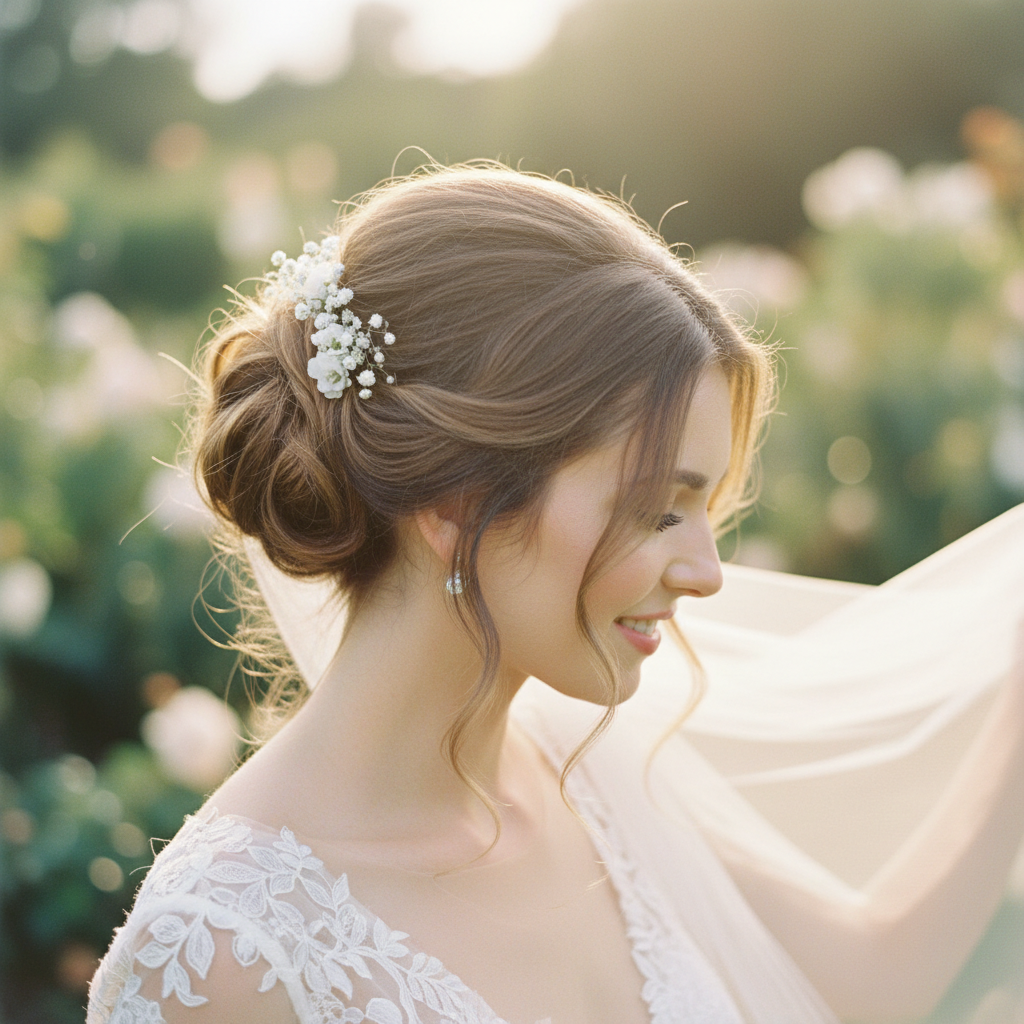
For the bride who dreams of a more relaxed, bohemian, or effortlessly chic look, the romantic messy bun is an exquisite choice. It offers a soft, ethereal vibe, perfect for garden weddings, beach ceremonies, or rustic celebrations.
Suitable Hair Length and Texture
- Length Medium to long hair is best. Layers can enhance the ‘messy’ texture.
- Texture Wavy or naturally textured hair is ideal as it provides inherent volume and movement. Straight hair can be curled first to add texture.
Face Shape Suitability
This style is incredibly versatile and suits most face shapes, particularly those with softer features. The loose tendrils can soften angular jawlines and add width to narrow faces.
Styling Method or Technique
- Preparation Apply a volumizing mousse or texturizing spray to damp hair and blow-dry using your fingers for natural texture. Curl sections of hair loosely with a curling iron to add waves and body.
- Gather Hair Tilt your head back slightly and gather your hair into a loose ponytail at the desired height (mid-nape or slightly higher for more volume). Do not secure tightly yet.
- Twist and Pin Twist the ponytail loosely and wrap it around itself, forming a bun. Instead of making it neat, allow some strands to fall out naturally.
- Secure with Pins Use bobby pins to secure the bun, focusing on pinning the base and tucking in any longer pieces that might unravel.
- Embrace the Mess Gently pull out small sections of hair around the crown and temples to create soft, face-framing tendrils. Lightly tease the bun itself for added volume and a ‘lived-in’ look.
- Set the Style Mist with a flexible-hold hairspray to maintain the soft feel while keeping the style in place.
Recommended Hair Tools and Products
- Texturizing spray or volumizing mousse
- Curling iron (optional, for straight hair)
- Bobby pins
- Flexible-hold hairspray
- Dry shampoo (for added texture)
Tips to Make the Hairstyle Last Longer
- Build a good foundation with texture products before styling.
- Use hairspray in layers as you create the bun, not just at the end.
- If using tendrils, a tiny dab of styling cream can prevent them from becoming frizzy.
- Avoid over-brushing or over-smoothing; the charm is in its natural look.
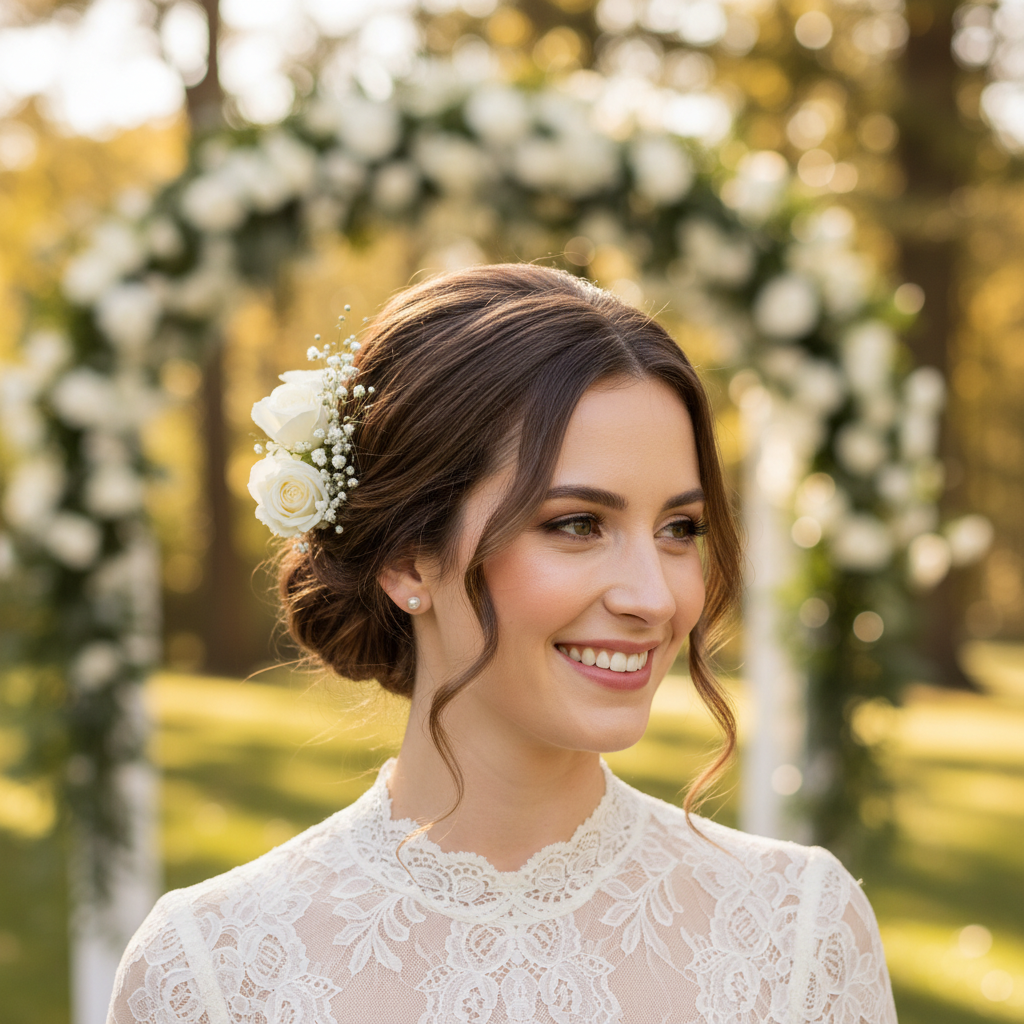
The Elegant Braided Bun
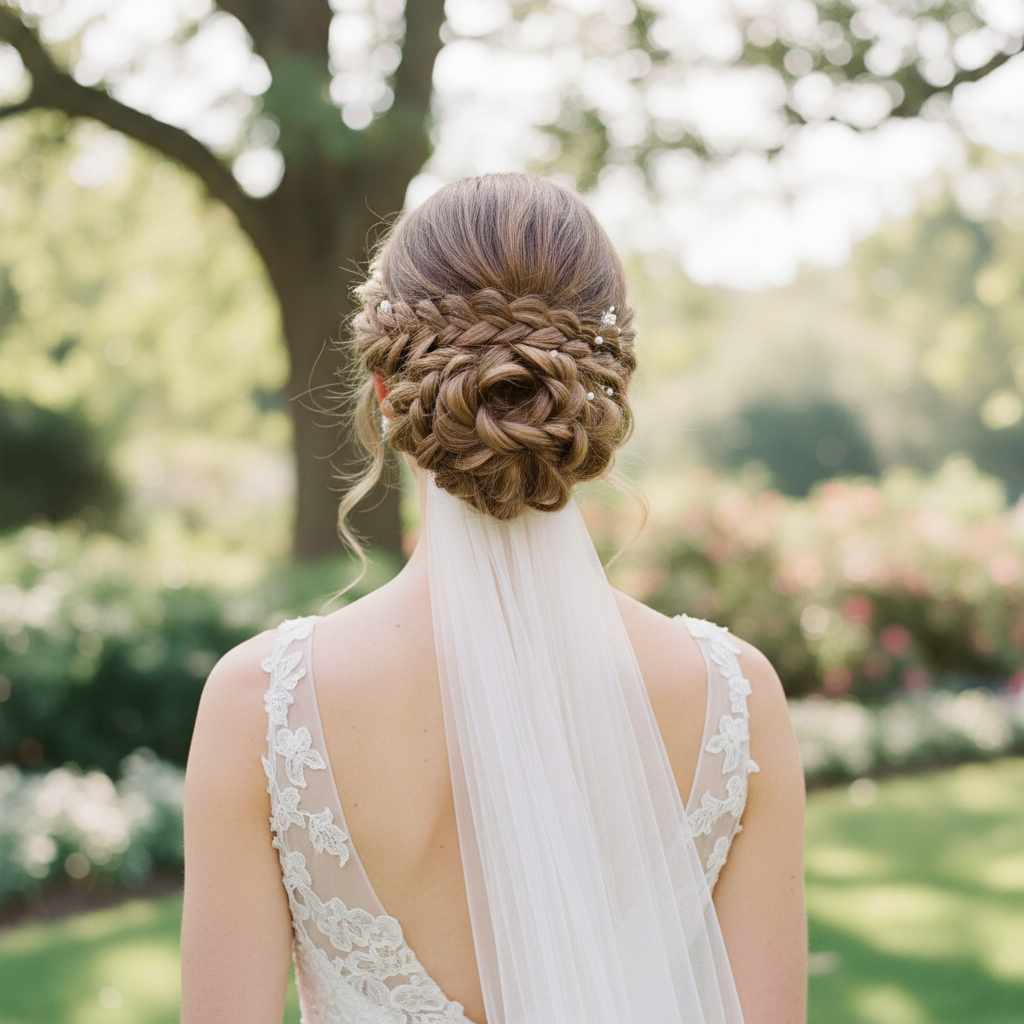
Combining the intricate beauty of braids with the classic elegance of a bun, the braided bun offers a sophisticated yet simple look. It adds texture and visual interest without being overly complex, perfect for a bride who loves detail.
Suitable Hair Length and Texture
- Length Long hair is best to create substantial braids that can be wrapped into a bun.
- Texture Straight, wavy, or fine hair that holds a braid well is ideal. Very curly hair might need to be smoothed or blown out for cleaner braids.
Face Shape Suitability
This style works wonderfully for most face shapes. The braided detail adds softness and a focal point, making it particularly lovely for round or square faces by adding vertical interest.
Styling Method or Technique
- Preparation Start with smooth, detangled hair. Apply a light styling cream or serum to tame flyaways and add shine.
- Sectioning Part your hair as desired. For a low braided bun, gather all hair into a low ponytail. For a more elaborate look, you can create two or three sections to braid separately.
- Braid Creation Braid the ponytail (or individual sections) into a simple three-strand braid. You can opt for a classic braid, a fishtail braid, or even a Dutch braid for more dimension. Secure the end with a small clear elastic.
- Wrap the Braid Gently tug at the sides of the braid to make it appear fuller. Then, wrap the braid around the base of the ponytail to form a bun.
- Secure the Bun Use bobby pins to secure the braided bun in place. Tuck the end of the braid neatly underneath the bun.
- Refine and Set Lightly mist with hairspray to hold the braids and the bun. Add small pearl pins or a delicate floral vine for extra bridal charm.
Recommended Hair Tools and Products
- Fine-tooth comb
- Clear elastic bands
- Bobby pins
- Light styling cream or serum
- Medium-hold hairspray
Tips to Make the Hairstyle Last Longer
- Ensure your braids are firm but not too tight, as this can cause discomfort over time.
- Use a texturizing spray on the hair before braiding for better grip and volume.
- If your hair is very slippery, a small amount of dry shampoo or volumizing powder at the roots can help.
The Chic Side Bun
A side bun offers a playful yet elegant twist on the traditional bun. It’s perfect for showcasing one side of your face, a beautiful earring, or a stunning hair accessory, adding an element of asymmetrical charm to your bridal look.
Suitable Hair Length and Texture
- Length Medium to long hair is ideal for creating a substantial side bun.
- Texture Straight, wavy, or lightly curled hair works well. A smooth finish often complements the chic asymmetry.
Face Shape Suitability
This style is particularly flattering for oval, round, and heart-shaped faces. The asymmetry can add interest and balance to rounder faces, while the side-swept look highlights cheekbones.
Styling Method or Technique
- Preparation Start with smooth, detangled hair. Create a deep side part on the opposite side from where you want the bun to sit.
- Gather Hair Bring all your hair over to one shoulder, gathering it into a low side ponytail just behind your ear. Secure it with a clear elastic.
- Twist or Braid You can either twist the ponytail into a simple coil and wrap it, or braid the ponytail first (like the braided bun) for added texture.
- Form the Bun Wrap the twisted or braided ponytail around its base, shaping it into a neat bun against the side of your head.
- Secure and Finish Use bobby pins to firmly secure the bun. Gently pull out a few face-framing pieces if desired, or keep it sleek. Finish with a strong-hold hairspray.
Recommended Hair Tools and Products
- Fine-tooth comb for parting
- Clear elastic bands
- Bobby pins
- Smoothing serum
- Strong-hold hairspray
Tips to Make the Hairstyle Last Longer
- Ensure the side ponytail is secured very tightly before forming the bun.
- Use a strong-hold gel or pomade to keep the side part and swept-over hair in place.
- Strategically place bobby pins in a crisscross pattern to prevent the bun from slipping.
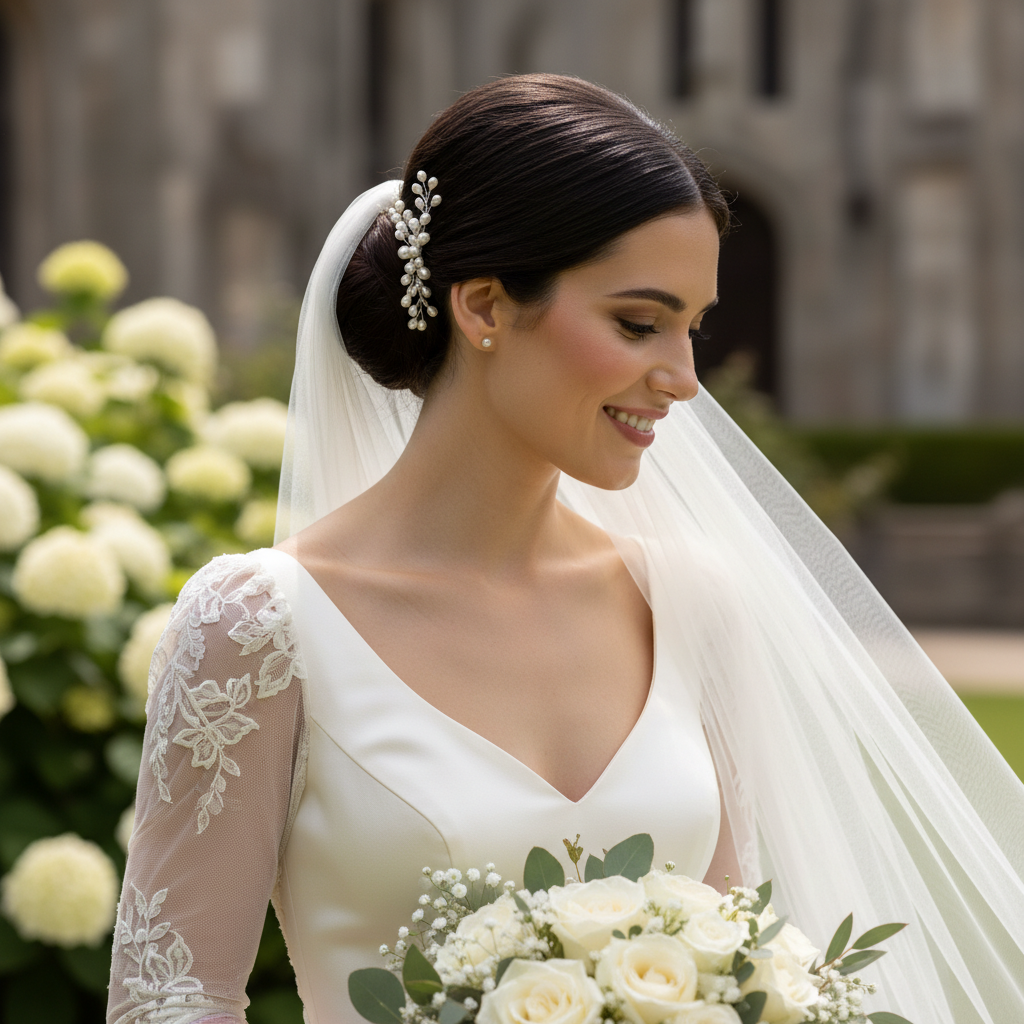
The Sophisticated Chignon
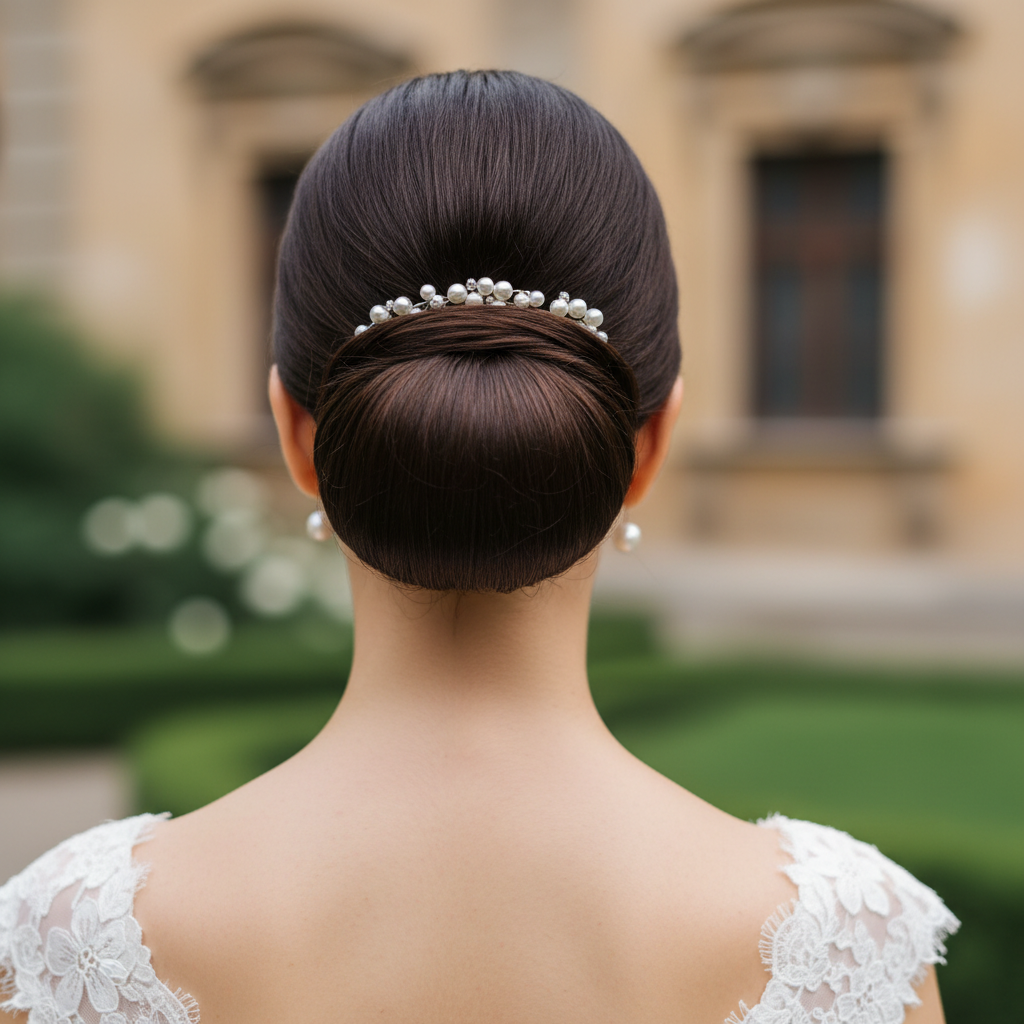
The chignon is a classic French bun, renowned for its sleekness and refined elegance. It often sits low at the nape of the neck, exuding an air of understated luxury, perfect for a formal or traditional wedding.
Suitable Hair Length and Texture
- Length Medium to long hair is best.
- Texture Straight or wavy hair that can be easily smoothed is ideal for achieving the chignon’s signature sleek finish.
Face Shape Suitability
Universally flattering, the chignon beautifully complements oval, square, and heart-shaped faces. It highlights the neck and collarbones, creating a graceful silhouette.
Styling Method or Technique
- Preparation Start with clean, smooth, detangled hair. Apply a heat protectant and gently flat iron hair for maximum sleekness. Create a neat middle or side part.
- Low Ponytail Gather all hair into a low ponytail at the nape of your neck. Secure with a clear elastic.
- Create a Loop Take a small section of hair from the ponytail and wrap it around the elastic band to conceal it, securing with a bobby pin.
- Roll and Tuck Take the remaining ponytail. Hold it horizontally and start rolling it upwards towards the base of your neck. Once rolled, tuck the ends underneath the roll, creating a neat, elongated bun shape.
- Secure the Chignon Use bobby pins along the top and bottom edges of the rolled bun, securing it firmly to your scalp.
- Smooth and Set Use a fine-tooth comb and strong-hold hairspray to smooth down any flyaways. Add a sparkling comb or delicate pins to one side for a touch of glamour.
Recommended Hair Tools and Products
- Fine-tooth comb
- Clear elastic band
- Bobby pins
- Smoothing serum or pomade
- Strong-hold hairspray
Tips to Make the Hairstyle Last Longer
- Ensure the initial ponytail is very secure and tight.
- The rolling motion should be firm to prevent the chignon from unraveling.
- Use a generous amount of hairspray and consider a light mist of shine spray for a polished finish.
Key Takeaways for Your Bridal Bun
- Preparation is Key Start with properly prepped hair (clean, textured, or smoothed as needed) for the best results.
- Practice Makes Perfect Try your chosen bun style several times before the wedding day to refine your technique.
- Product Power Don’t underestimate the role of good quality styling products for hold, shine, and longevity.
- Accessorize Wisely Buns are perfect for showcasing delicate veils, sparkling pins, fresh flowers, or elegant combs.
- Comfort Matters Ensure your bun is secure but not uncomfortably tight, as you’ll be wearing it for many hours.
Hair Care and Maintenance Tips
- Deep Conditioning In the weeks leading up to your wedding, treat your hair to regular deep conditioning treatments for optimal health and shine.
- Trim Ends Get a trim 2-3 weeks before the wedding to remove split ends and ensure your hair looks its healthiest.
- Gentle Brushing Use a soft-bristle brush to avoid breakage, especially when detangling.
- Protect from Heat Always use heat protectant when styling with hot tools to prevent damage.
- Silk Pillowcase Sleeping on a silk pillowcase can help reduce frizz and tangles, keeping your hair smoother.
Styling Dos and Don’ts
Do’s
- Do use good quality hairspray for hold.
- Do use bobby pins that match your hair color.
- Do consider your veil and accessories when planning your bun’s placement.
- Do ask a friend or stylist to help secure stubborn sections.
- Do embrace your natural hair texture if a messy bun is your goal.
Don’ts
- Don’t over-saturate your hair with product, which can make it heavy and greasy.
- Don’t forget to secure all loose ends to prevent unraveling.
- Don’t try a completely new style on your wedding day without a practice run.
- Don’t pull your hair too tightly, which can cause headaches.
- Don’t forget to pack extra bobby pins and hairspray for touch-ups.
Common Mistakes to Avoid
- Not Enough Hold Using too little hairspray or too few pins will lead to the bun falling apart.
- Greasy Hair Over-conditioning or using too much shine serum can make hair slippery and hard to style.
- Skipping Prep Not properly preparing the hair (e.g., adding texture to fine hair) can make styling difficult.
- Overly Complicated Choosing a bun that is too complex for your skill level or hair type can lead to frustration. Stick to simple for ease.
- Ignoring Hair Health Damaged or dry hair won’t hold styles as well or look as radiant. Prioritize hair health.
Occasion-Based Styling Advice
Simple bridal buns are incredibly versatile and can be adapted for various wedding themes and seasons:
- Traditional Church Wedding A classic low bun or sleek chignon paired with a veil exudes timeless grace.
- Outdoor Garden Ceremony A romantic messy bun adorned with fresh flowers complements the natural setting beautifully.
- Beach Wedding A relaxed, slightly undone side bun can withstand a gentle breeze and feels effortlessly chic.
- Modern City Elopement A sleek, minimalist low bun or chignon perfectly matches a contemporary, sophisticated vibe.
- Winter Wedding A sophisticated braided bun can add warmth and texture, especially when paired with a faux fur wrap.
Each of these simple bun styles can be customized with accessories, adding your personal touch to create a truly memorable bridal look.
Conclusion
Choosing your wedding day hairstyle is an exciting part of the planning process, and a simple bridal bun offers unparalleled elegance, versatility, and ease. From the timeless charm of a classic low bun to the romantic allure of a messy updo or the sophisticated detail of a braided style, there’s a perfect bun waiting to complete your bridal vision. With these step-by-step guides, recommended products, and expert tips, you’re now equipped to create a stunning, long-lasting look that will make you feel confident and beautiful as you walk down the aisle. Embrace the simplicity, and let your natural radiance shine through on your extraordinary day.