

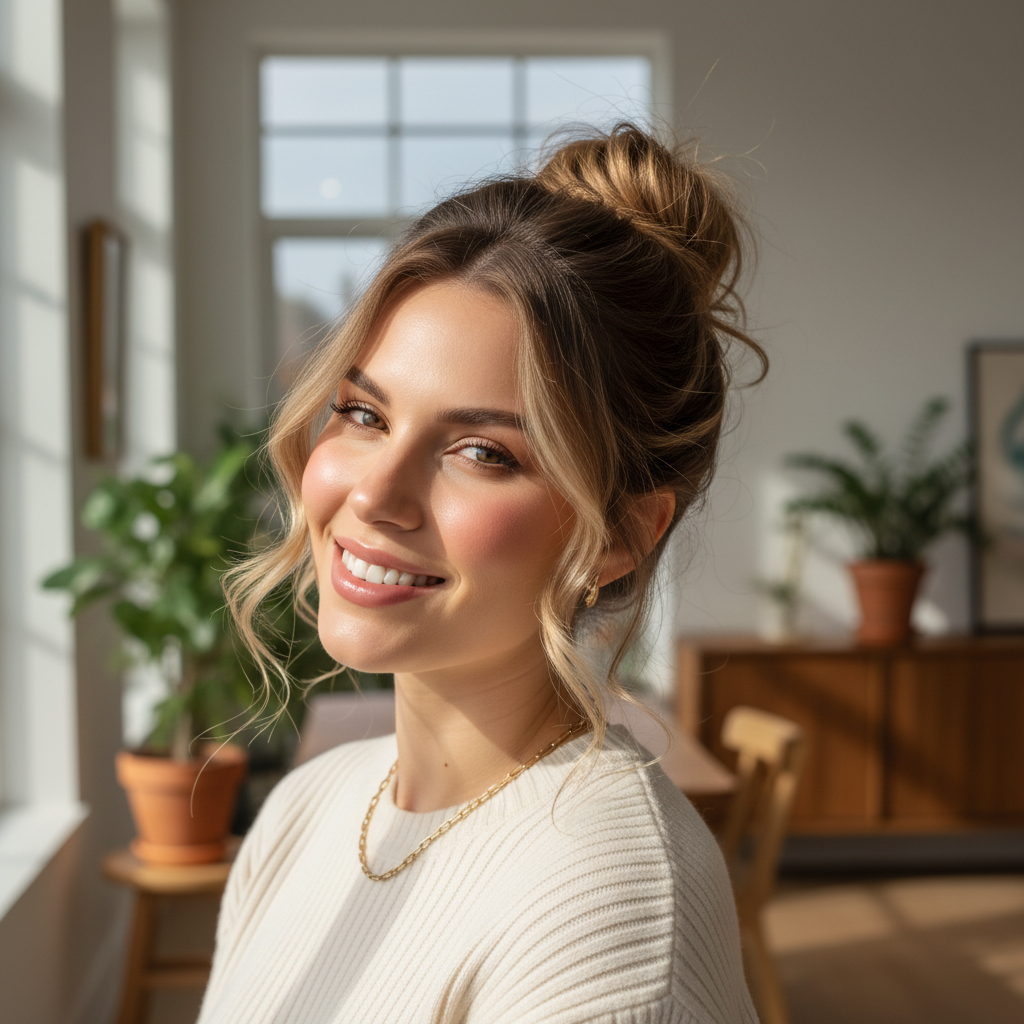
The messy bun is a true hair hero—effortless, chic, and versatile enough for almost any occasion. Whether you’re rushing out the door, need a quick refresh, or want to add a touch of relaxed elegance to your look, a messy bun is your go-to. But for many, achieving that perfectly undone look can feel more challenging than it appears. If you’ve ever found yourself frustrated with lopsided knots or buns that just won’t stay, you’re in the right place. This guide is designed specifically for beginners, breaking down the art of the messy bun into simple, manageable steps, ensuring you can rock this iconic style with confidence.
Why We Love the Messy Bun

The appeal of the messy bun lies in its inherent contradiction—it’s both casual and stylish, relaxed and refined. It’s the ultimate ‘I woke up like this’ hairstyle, giving the impression of minimal effort while still looking put-together. Beyond its aesthetic charm, the messy bun is incredibly practical. It keeps hair off your face and neck, making it ideal for busy days, workouts, or hot weather. Plus, it’s a fantastic way to extend the life of your hair between washes, transforming second or third-day hair into a fashionable statement.
Essential Tools and Products for Your Messy Bun
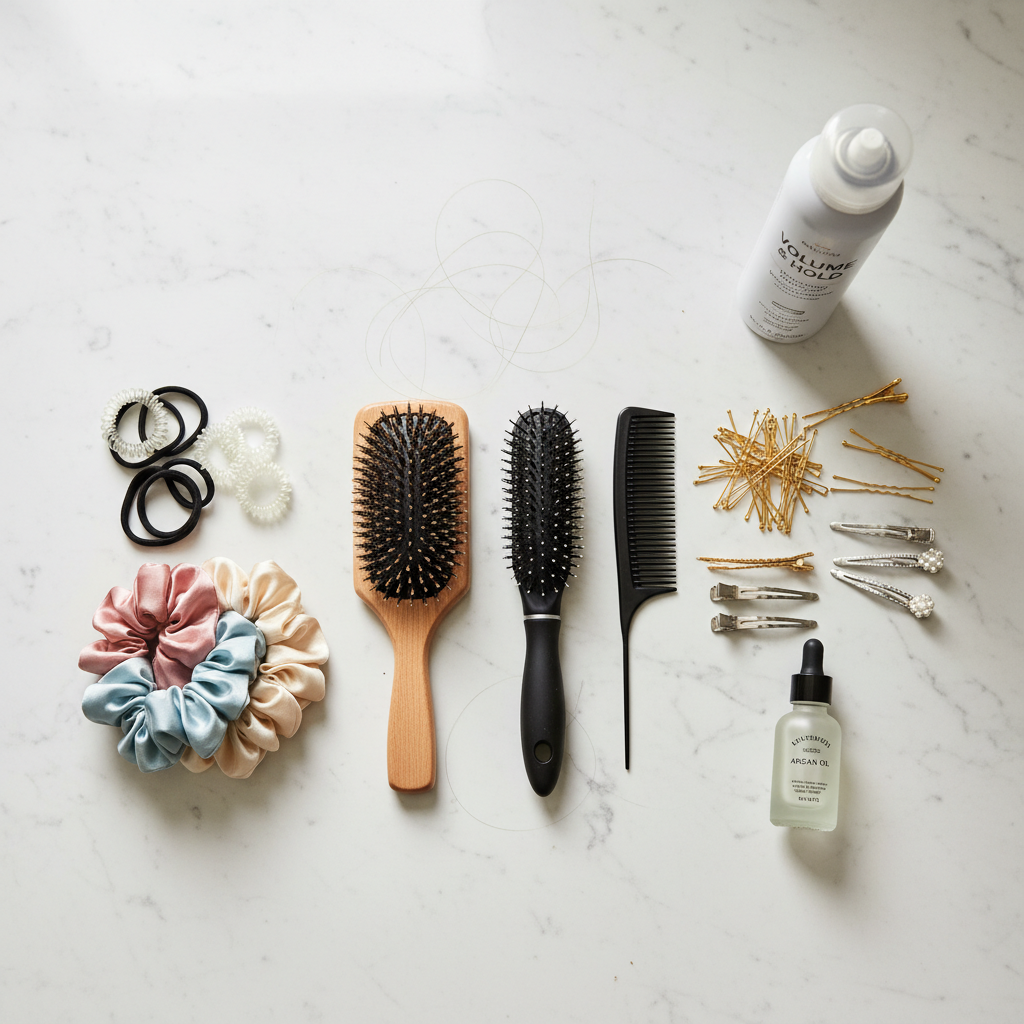
Before diving into the styling, gathering the right tools and products can make all the difference in achieving a lasting and lovely messy bun. You don’t need a salon’s worth of supplies, but a few key items will be your best friends.
- Hair Ties Opt for soft, snag-free elastic ties that won’t pull or damage your hair. Spiral hair ties (like invisibobble) are excellent for preventing creases and providing a strong hold without being too tight.
- Bobby Pins A handful of bobby pins, ideally matching your hair color, are crucial for securing loose strands and adding extra hold.
- Hair Brush or Comb A paddle brush or a wide-tooth comb will help detangle your hair before styling, ensuring a smooth foundation.
- Dry Shampoo Perfect for adding texture and absorbing excess oil, especially if you’re working with second-day hair.
- Texturizing Spray or Volumizing Powder These products are game-changers for adding grip and volume, making it easier to create that coveted ‘messy’ look.
- Light-Hold Hairspray A finishing spray will help set your bun and tame any flyaways without making your hair stiff.
The Classic Everyday Messy Bun- A Step-by-Step Guide
This is the quintessential messy bun, perfect for daily wear, errands, or a casual brunch. It sits high or mid-crown and offers that desirable relaxed vibe.
Suitable Hair Length and Hair Texture
This style works best on medium to long hair. It’s incredibly versatile for all hair textures—straight, wavy, curly, or coily—as the ‘messy’ aspect embraces natural texture. Finer hair might benefit from extra texturizing product.
Face Shape Suitability
The classic messy bun is flattering on most face shapes. It can add height, which helps to elongate round or square faces. For oval or heart-shaped faces, it enhances natural features without overpowering them.
Styling Method and Technique
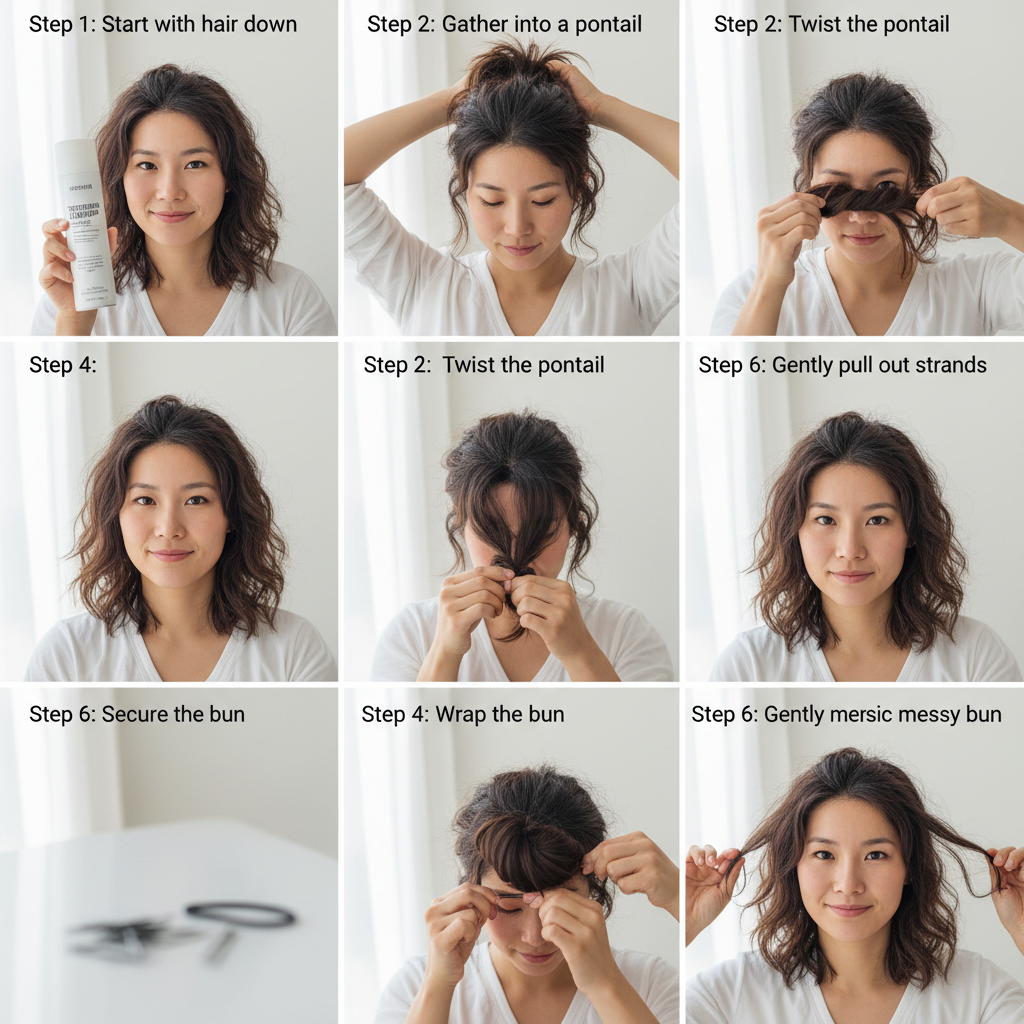
- Prep Your Hair If your hair is clean and slippery, mist it lightly with dry shampoo or texturizing spray to add grip and volume. Gently brush through to remove any tangles.
- Gather Your Hair Flip your head upside down or gather your hair at the desired height (usually the crown or slightly below). Use your fingers to sweep it up into a loose ponytail. Don’t worry about being too neat; stray pieces are part of the charm.
- Twist and Wrap Hold the ponytail firmly with one hand. With the other hand, lightly twist the ponytail.
- Form the Bun Start wrapping the twisted ponytail around its base. As you wrap, create a loose coil.
- Secure with Hair Tie Once you’ve wrapped most of the hair, take your hair tie and secure the bun around its base. Don’t pull it too tight; leave it a little loose.
- Rough It Up Gently tug on sections of the bun to loosen it and create a fuller, messier look. Pull out a few face-framing pieces around your temples and ears for a softer finish.
- Pin for Security Use bobby pins to secure any overly loose sections or stray ends that aren’t contributing to the messy aesthetic. Insert pins discreetly into the base of the bun.
- Set Your Style Finish with a light mist of hairspray to hold everything in place without stiffness.
Recommended Hair Tools and Products
- Paddle brush or wide-tooth comb
- Spiral hair ties
- Bobby pins
- Dry shampoo or texturizing spray
- Light-hold hairspray
Tips to Make the Hairstyle Last Longer
- Start with slightly dirty hair (day-old hair has more grip).
- Use a good texturizing spray generously before you begin.
- Don’t be afraid to use a few extra bobby pins to secure key areas.
- Avoid touching your bun throughout the day to prevent loosening.
The Low Messy Bun- Effortless Chic

A sophisticated twist on the classic, the low messy bun sits at the nape of your neck, offering a more polished yet still relaxed look. It’s perfect for work, dinner dates, or when you want a slightly more refined finish.
Suitable Hair Length and Hair Texture
Ideal for medium to long hair. Works beautifully with straight, wavy, or fine hair, offering a sleek base with a touch of texture. Curly hair can also work, creating a fuller, more voluminous low bun.
Face Shape Suitability
This style is particularly flattering for oval, heart, and long face shapes, as it draws attention to the jawline and neck. It can also soften angular features.
Styling Method and Technique
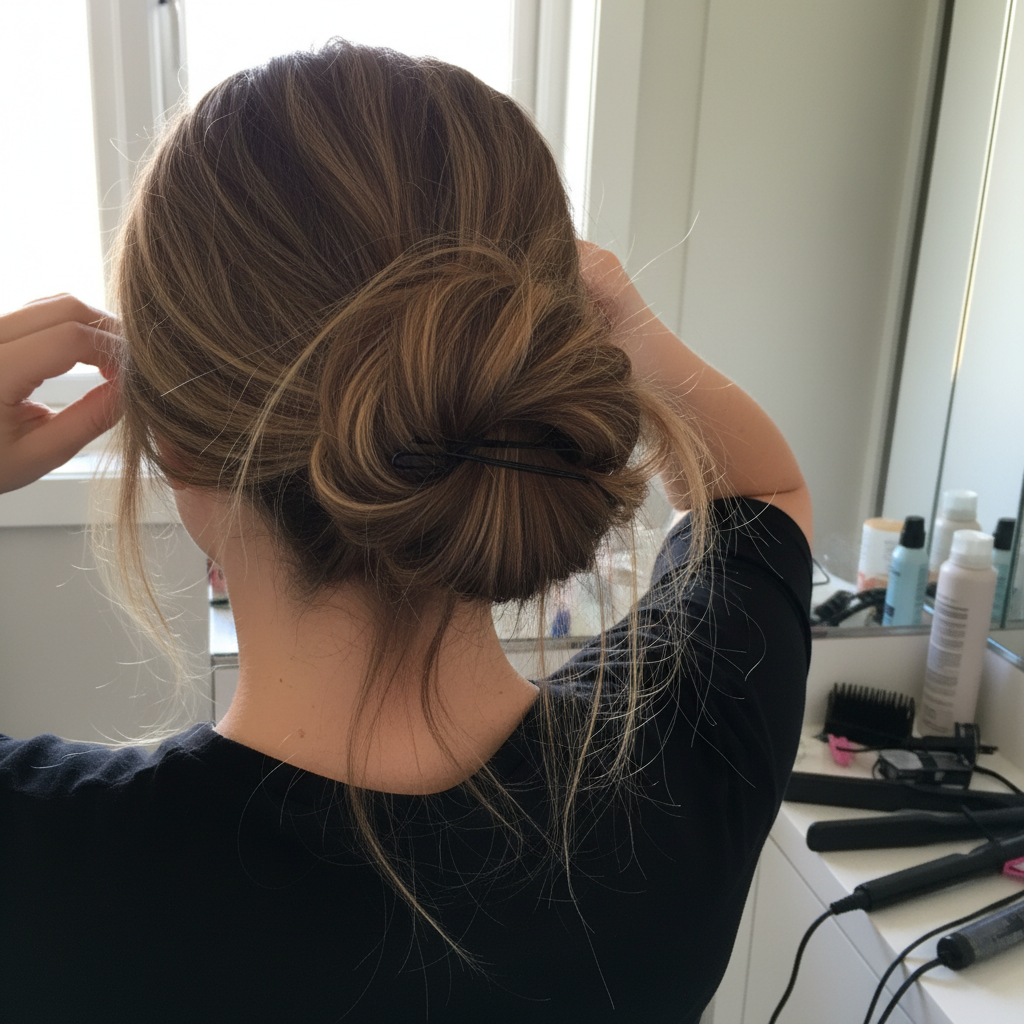
- Prep Hair Brush your hair smooth. If desired, apply a smoothing serum to reduce frizz, especially around the hairline. For added volume, a texturizing spray at the roots can help.
- Gather Hair Low Gather all your hair at the nape of your neck, as if you’re creating a low ponytail.
- Create a Loop Secure your hair with a hair tie, but on the last loop, only pull your hair halfway through, creating a small loop or bun. Let the ends hang loose.
- Wrap and Pin Take the loose ends and wrap them around the base of the small loop. Use bobby pins to secure these ends discreetly into the bun.
- Gently Loosen Gently tug at the bun and the hair around your temples and ears to create a softer, slightly messy effect. Pull out a few delicate strands if you like.
- Set the Style Finish with a flexible-hold hairspray to keep it in place.
Recommended Hair Tools and Products
- Fine-tooth comb or paddle brush
- Soft elastic hair ties
- Bobby pins
- Smoothing serum (optional)
- Flexible-hold hairspray
Tips to Make the Hairstyle Last Longer
- Ensure your hair tie is snug (but not too tight) at the base.
- Criss-cross bobby pins for extra hold at the back.
- Use a stronger hold hairspray if you need it to last through a long event.
The Half-Up Messy Bun- Casual and Cute

The half-up messy bun is the epitome of casual chic. It keeps hair out of your face while letting your length flow freely, perfect for everyday wear, festivals, or a relaxed weekend look.
Suitable Hair Length and Hair Texture
Best for medium to long hair. It works beautifully with wavy and curly hair, enhancing natural texture. Straight hair can also achieve this look with the help of texturizing products or by adding soft waves beforehand.
Face Shape Suitability
Flattering on all face shapes, the half-up messy bun can add width to a narrow face or soften strong jawlines. It highlights facial features without fully pulling hair back.
Styling Method and Technique
- Prep Hair Start with dry hair. For added texture, you can curl or wave the bottom section of your hair. Apply dry shampoo or texturizing spray to the roots of the top section.
- Section Your Hair Separate the top section of your hair, from your temples or just above your ears, up to the crown. You can use your fingers to create a slightly uneven part for a messier look.
- Create a High Ponytail Gather this top section into a high ponytail, positioning it where you want your bun to sit.
- Form the Messy Bun On the last loop of your hair tie, only pull the hair halfway through, creating a small loop. Let the ends spill out.
- Wrap and Secure Take the loose ends and wrap them loosely around the base of the loop. Use bobby pins to secure these ends into the bun, making sure they feel secure but look undone.
- Loosen and Frame Gently tug at the bun to make it fuller and messier. Pull out a few small strands around your face to soften the look.
- Finish A light spritz of hairspray will help hold the bun and any waves in place.
Recommended Hair Tools and Products
- Texturizing spray
- Hair ties (small, clear elastics work well for finer hair)
- Bobby pins
- Curling iron or wand (optional, for waves)
- Light-hold hairspray
Tips to Make the Hairstyle Last Longer
- Backcomb the roots of the top section slightly before gathering for more volume and grip.
- Ensure the hair tie for the mini-ponytail is tight enough to hold the weight of the bun.
- Use a strong-hold hairspray on the bun itself if you plan to be active.
Styling Tips for Different Hair Textures

Understanding your hair texture is key to perfecting your messy bun.
- Straight Hair Often needs help with grip and volume. Use dry shampoo or texturizing spray generously. Consider adding soft waves with a curling iron before styling to give the bun more body.
- Wavy Hair Naturally lends itself to a messy bun. Embrace your waves! Use a sea salt spray for enhanced texture before styling.
- Curly and Coily Hair Can create incredibly voluminous and beautiful messy buns. Use a leave-in conditioner or curl cream to define curls before gathering. Don’t over-brush; use fingers to gather hair to maintain curl pattern.
Making Your Messy Bun Last All Day

- Start with Texture Day-old hair or hair prepped with dry shampoo/texturizing spray has more grip than freshly washed, silky hair.
- Don’t Be Too Perfect The messier you start, the better it holds. Tightly coiled buns tend to unravel faster.
- Strategic Pinning Use bobby pins to anchor the bun to the hair beneath it, not just to itself. Criss-cross two bobby pins for an extra secure hold.
- Finish with Hairspray A flexible hold hairspray can be your best friend, locking in the style without making it crunchy.
- Avoid Over-Touching The more you play with your bun, the more likely it is to fall out.
Common Messy Bun Mistakes to Avoid
- Too Tight A bun that’s pulled too tightly looks severe and can cause headaches. Loosen up!
- Too Perfect Trying to make it perfectly symmetrical defeats the purpose of a ‘messy’ bun. Embrace the imperfections.
- Not Enough Texture Slippery, clean hair struggles to hold a bun. Add products for grip.
- Wrong Hair Tie Thin, weak hair ties won’t provide enough support, especially for thicker hair. Invest in good quality ties.
- Forgetting Bobby Pins While the tie does most of the work, bobby pins are essential for securing those sneaky loose ends.
Hair Care for Messy Bun Lovers
While messy buns are fantastic for protecting hair and extending washes, it’s important to maintain a good hair care routine to keep your locks healthy.
- Gentle Detangling Always detangle gently before and after styling to prevent breakage, especially if your hair is prone to knots from being in a bun.
- Hydration is Key Regular deep conditioning treatments will keep your hair strong and prevent dryness, which can be exacerbated by constant styling.
- Scalp Health If you rely on dry shampoo often, ensure you’re regularly cleansing your scalp to prevent product buildup.
- Vary Your Styles While messy buns are great, give your hair a break by wearing it down or in other loose styles occasionally.
Key Takeaways

- The messy bun is a versatile, effortless style for all occasions.
- Essential tools include good hair ties, bobby pins, and texturizing products.
- Don’t aim for perfection; embrace the ‘undone’ look.
- Adjust your technique based on your hair length and texture.
- Proper prep and strategic pinning are key to making your bun last.
- Avoid common mistakes like pulling too tight or neglecting texture.
- Maintain hair health with gentle care and hydration.
Mastering the messy bun is all about practice and understanding your own hair. Don’t be discouraged if your first few attempts aren’t exactly what you envisioned. The beauty of this style lies in its imperfection. Experiment with different heights, levels of ‘messiness,’ and face-framing pieces until you find the look that feels most authentic and flattering for you. With these step-by-step guides and tips, you’re now equipped to confidently create a beautiful, effortless messy bun every single time. Go ahead, embrace the glorious mess!